Getting started
Plugin setup
You'll be using Omnisearch in less than 20 minutes. To start we need a few things:
- Install plugin.
- Get Omnisearch API Key.
- Enable your data API
- Get your Search Provider's API keys.
- Sync your database.
Install plugin
Head on over to your plugin tab, search "Omnisearch" and install.
Get Omnisearch API key
Next, go to https://scious.io/plugins > scroll to Omnisearch > tap Get API Key > and enter your email to sign in / make an account. This will email you a login link so check your spam folder if you're not seeing one. Within that email, tap Sign in now → to be taken to the Omnisearch API key dashboard. Here, you'll need to fill out your account details such as first and last name. Then, navigate to Get API key for bubble app > and fill in the Bubble app URL for the app you want to use Omnisearch with. Next, tap one of the subscribe options and complete your payment (new users get a 10 day, very easy to cancel, free trial).
At this point, you'll see the following:
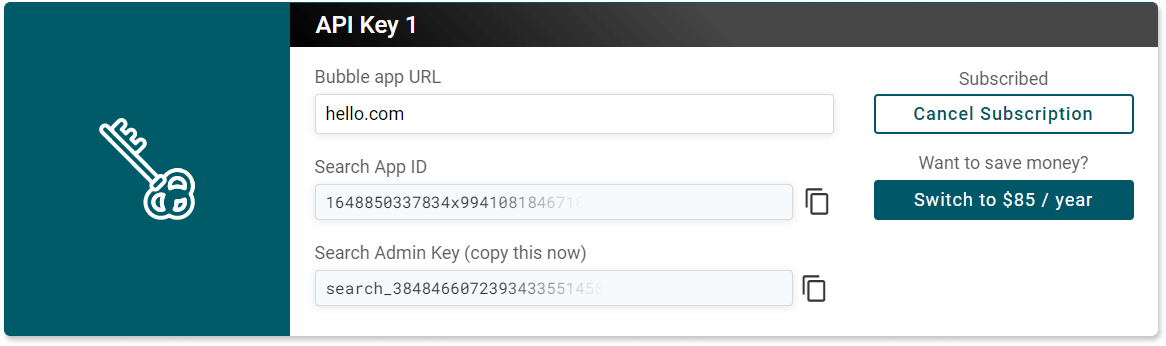
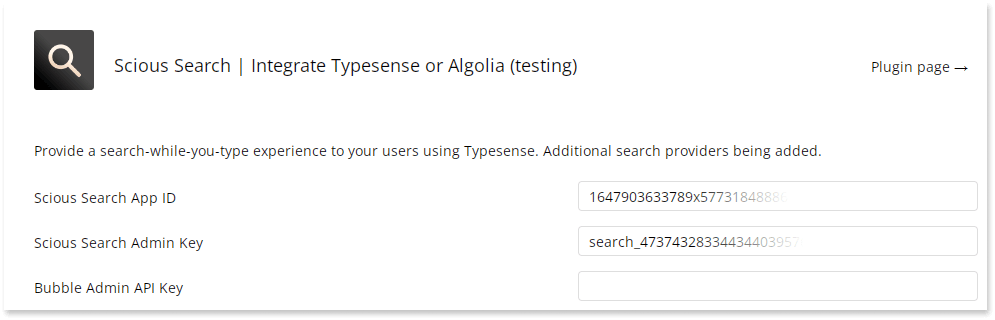
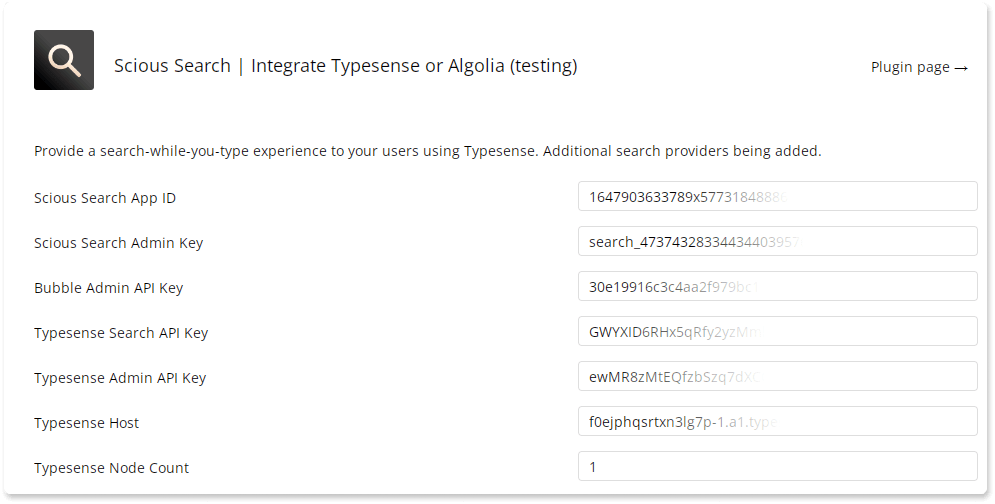
Copy Search Admin Key and the Search App ID then, in your Bubble app editor, navigate to the Plugins tab > Omnisearch plugin > and paste those values into their sections, like so:
API keys are transferrable. If you want to use Omnisearch in another app, then update Bubble app URL accordingly > tap Replace key to generate a new API key, and finally add that new Search Admin Key and the Search App ID to the plugin configuration page in your app.
Enable data API
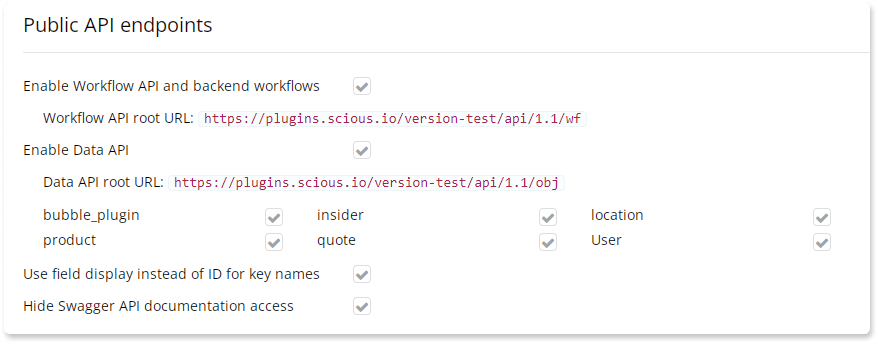
In your bubble editor, tap Settings > API tab > and then check Enable Data API. Below this you'll see a list of data types you can make available via the data API - check all the ones you'll want to search with our plugin. If you're not sure about which ones to enable, then you can always come back to this.
Next, ensure that Use field display instead of ID for key names is enabled. By now, you're screen will look something like:
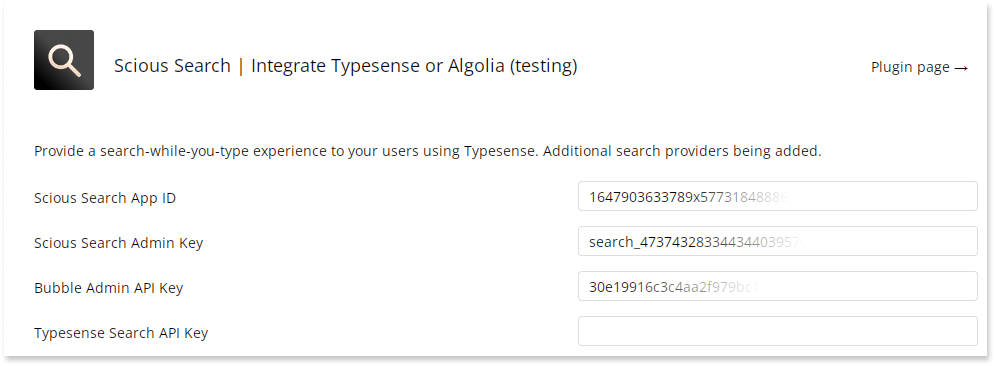
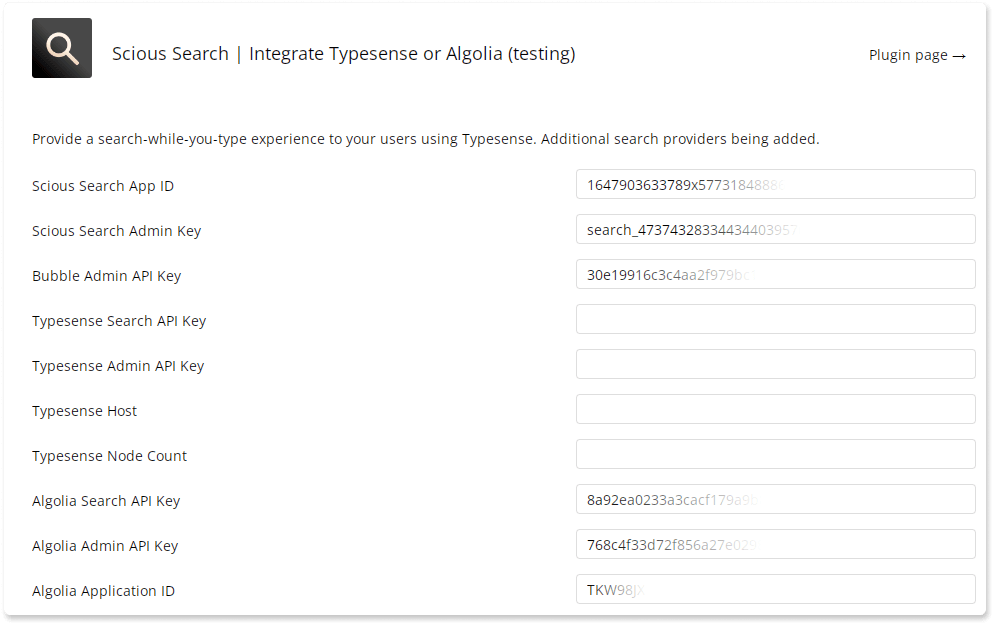
While still on the API tab > next scroll down to the API tokens section > tap Generate a new api token > and tap on the private key provided to copy it. We need to add this to the Omnisearch plugin so next press on your Plugins tab > scroll to Omnisearch and paste the private key as the Bubble Admin API Key. Your plugin configuration page will now look like:
Get search provider API keys
- Algolia
- Typesense
If you already have an existing Algolia application with data in it, then first create a new application before proceeding with the remainder of this tutorial. Our synchronization step will overwrite same named indices in the selected application. Once created, use the new application's API keys and ID in the following step.
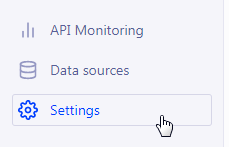
Algolia integrations require three things: an Application ID, Search API Key and an Admin API Key. To get these, log into Algolia > navigate to Settings on the bottom left corner of your screen:
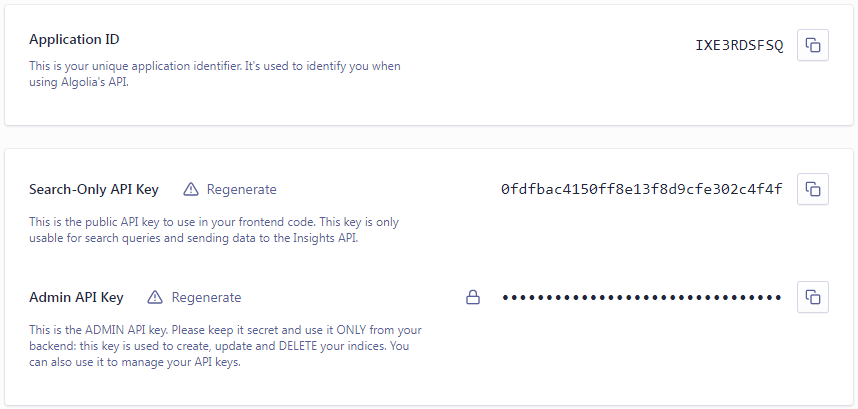
then > tap API Keys:

If you've just created an Algolia account then the fields we need will be listed like so:
Finally, in your bubble editor, navigate to Plugins > Omnisearch > then paste the Application ID, Search Only API Key and Admin API Key into the Omnisearch plugin configuration fields for Algolia.
If you already have an existing Typesense cluster with data in it, then first create a new cluster before proceeding with the remainder of this tutorial. Our synchronization step will overwrite same named indices in the selected application. Once created, use the new cluster's API keys and host in the following step.
Typesense integrations require three things: a Host, Search API Key and an Admin API Key. To get these, log into Typesense > then create a new cluster with the default configuration by tapping Clusters in the nav bar > then + New Cluster and finally Launch. After your cluster is provisioned, click Generate API Keys:
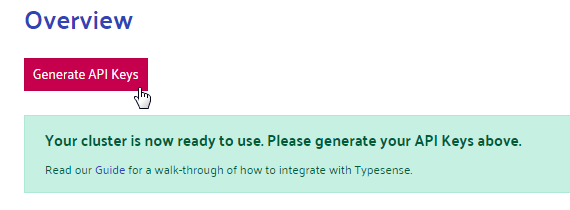
When prompted, save the generated .txt file to a secure location > then open it. The fields we need will be listed like so:
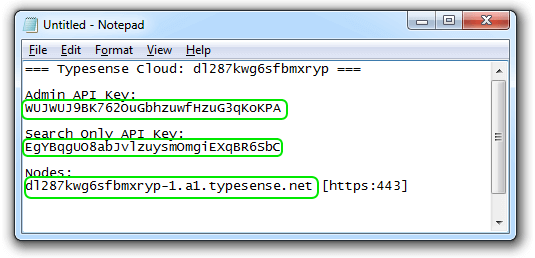
Finally, in your bubble editor, navigate to Plugins > Omnisearch > then paste the Search Only API Key, Admin API Key and Node/Host into the Omnisearch plugin configuration fields for Typesense.
Sync your database
If you already have an Algolia (or Typesense) index with data in it, ensure you create a new Algolia application (or Typesense cluster) and set it's ID in the Omnisearch plugin configuration tab. Otherwise, the following steps may overwrite existing indices.
We provide a Sync Search Index action for mirroring data from your Bubble app to your search provider. While you can use this to create your own synchronization administration page, we've already built a Search Admin Dashboard template you can copy into your app to get you going. The template looks like this. Let's overview it, first, by following the demo below.
Now that you have a feel for how the Search Admin Dashboard looks and feels, let's add it to your app. Follow these directions. Towards the middle, you'll be asked to open the our Admin Dashboard Template - link to our editor for that is here. You'll be directed to copy the Group Search Admin Dashboard group "with workflows" and "Paste with workflows" into your app.
By default, this template will sync the selected datatype for the current environment it's used in (test, live or other). This means that syncing other environments requires loading the Search Admin Dashboard for that environment and then syncing as needed. Of course, you can change this to work as you like - say, to sync any environment from the test environment via dropdown menu. We leave the implementation of such changes to end users.
Implement search
Once you've synced your data type(s) of interest, we can start searching them! This is as easy as placing our Omnisearch visual element onto your page (a page other than your sync-admin page), specifying:
Search ProviderResult typeFields to search
and finally displaying the visual element's Search Results in a repeating group. We're actively creating a demo like the ones above to demonstrate this and will update this section to better illustrate this soon. In the mean time, check out any of the Omnisearch visual elements from our demo to see exactly how this is setup.
Keep your search index synchronized
Once both your search index and data type of interest are synchronized, the best way to keep them synchronized is to create, update or delete individual search records as the records for that data type are created, updated or deleted.
Since we're getting started, an easy way to do this is to:
- Create a backend trigger (of whichever data type(s) you often upload) who's condition is to run when thing before
unique_idis empty and thing nowunique_idis not empty. This will have the effect of triggering whenever a new record of that thing is created in your bubble app. - As an action in the above trigger, now create a search search record.
That's it. Now, every time you create a record, this workflow will trigger and create a new search record. You can setup similar triggers to update a search record. We've seen this approach work well in production. That said, since this approach relies on a backend trigger, which naturally adds a small delay to running that set of actions, you may instead want to create / update your search records as you create / update data types client side. To do this, you'll simply follow-up any create / modify data type action in your regular workflows with either of our Create / Update Search record actions. This ensures that your search indices are up to date within, on average, 3 seconds.
When to resync search indices
- After upgrading plugin versions. This ensures your search index and plugin are always configured correctly since, from time to time, we change the way indices are built and referenced.
- After editing any name of any field relevant to a search. A field is relevant if it is used to filter, search or sort records. Specifically, this extends to:
- Data type name
- Data type field
- Option set name
- Option name but changing any of an option's other attributes does not require a resync.
- After changing your domain name. You will also need to update your Omnisearch API key, see here ⤴ .